 Twitter
 GitHub
 Blog
Blog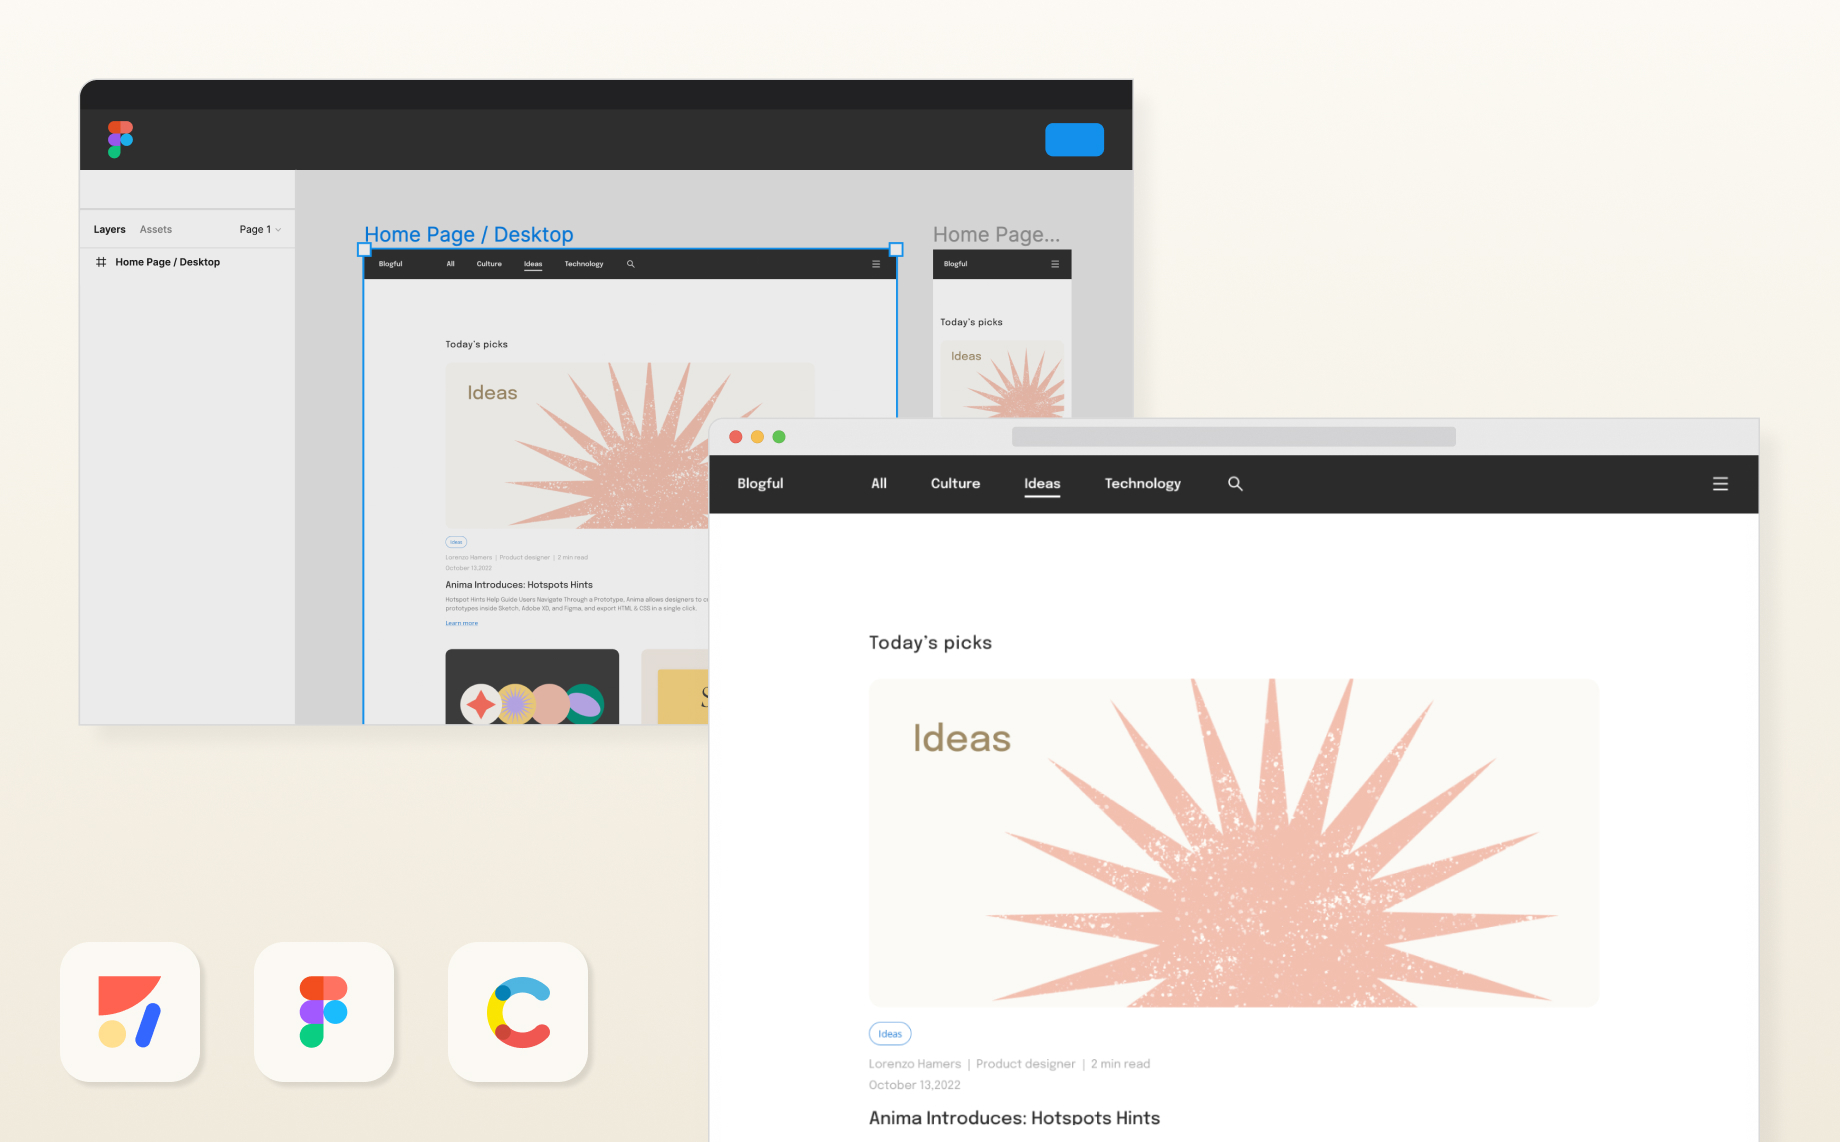
Build a blog with Anima’s React code + Contentful’s headless CMS4 min read
Reading Time: 4 minutesBefore Starting
- Sign up to Anima
- Install the plugin for Figma
- Create your first Anima Project on the platform
Get the code from the design
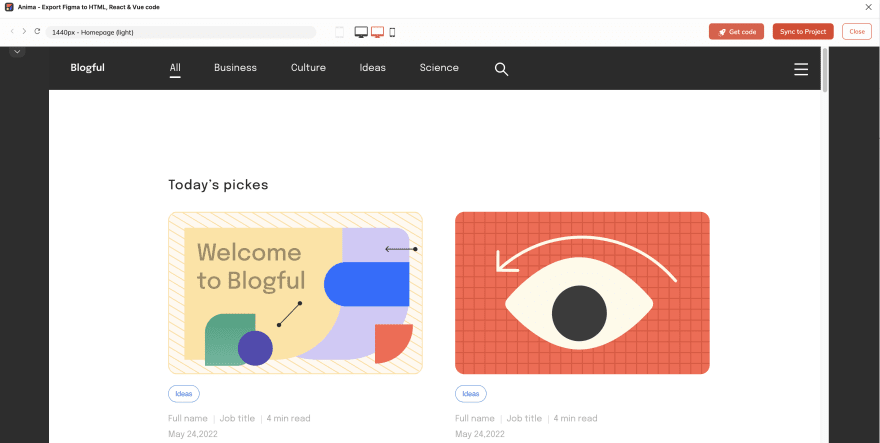
With Anima, we can build complete reusable React components from a Figma design. For this tutorial, we are going to use this
blog template.
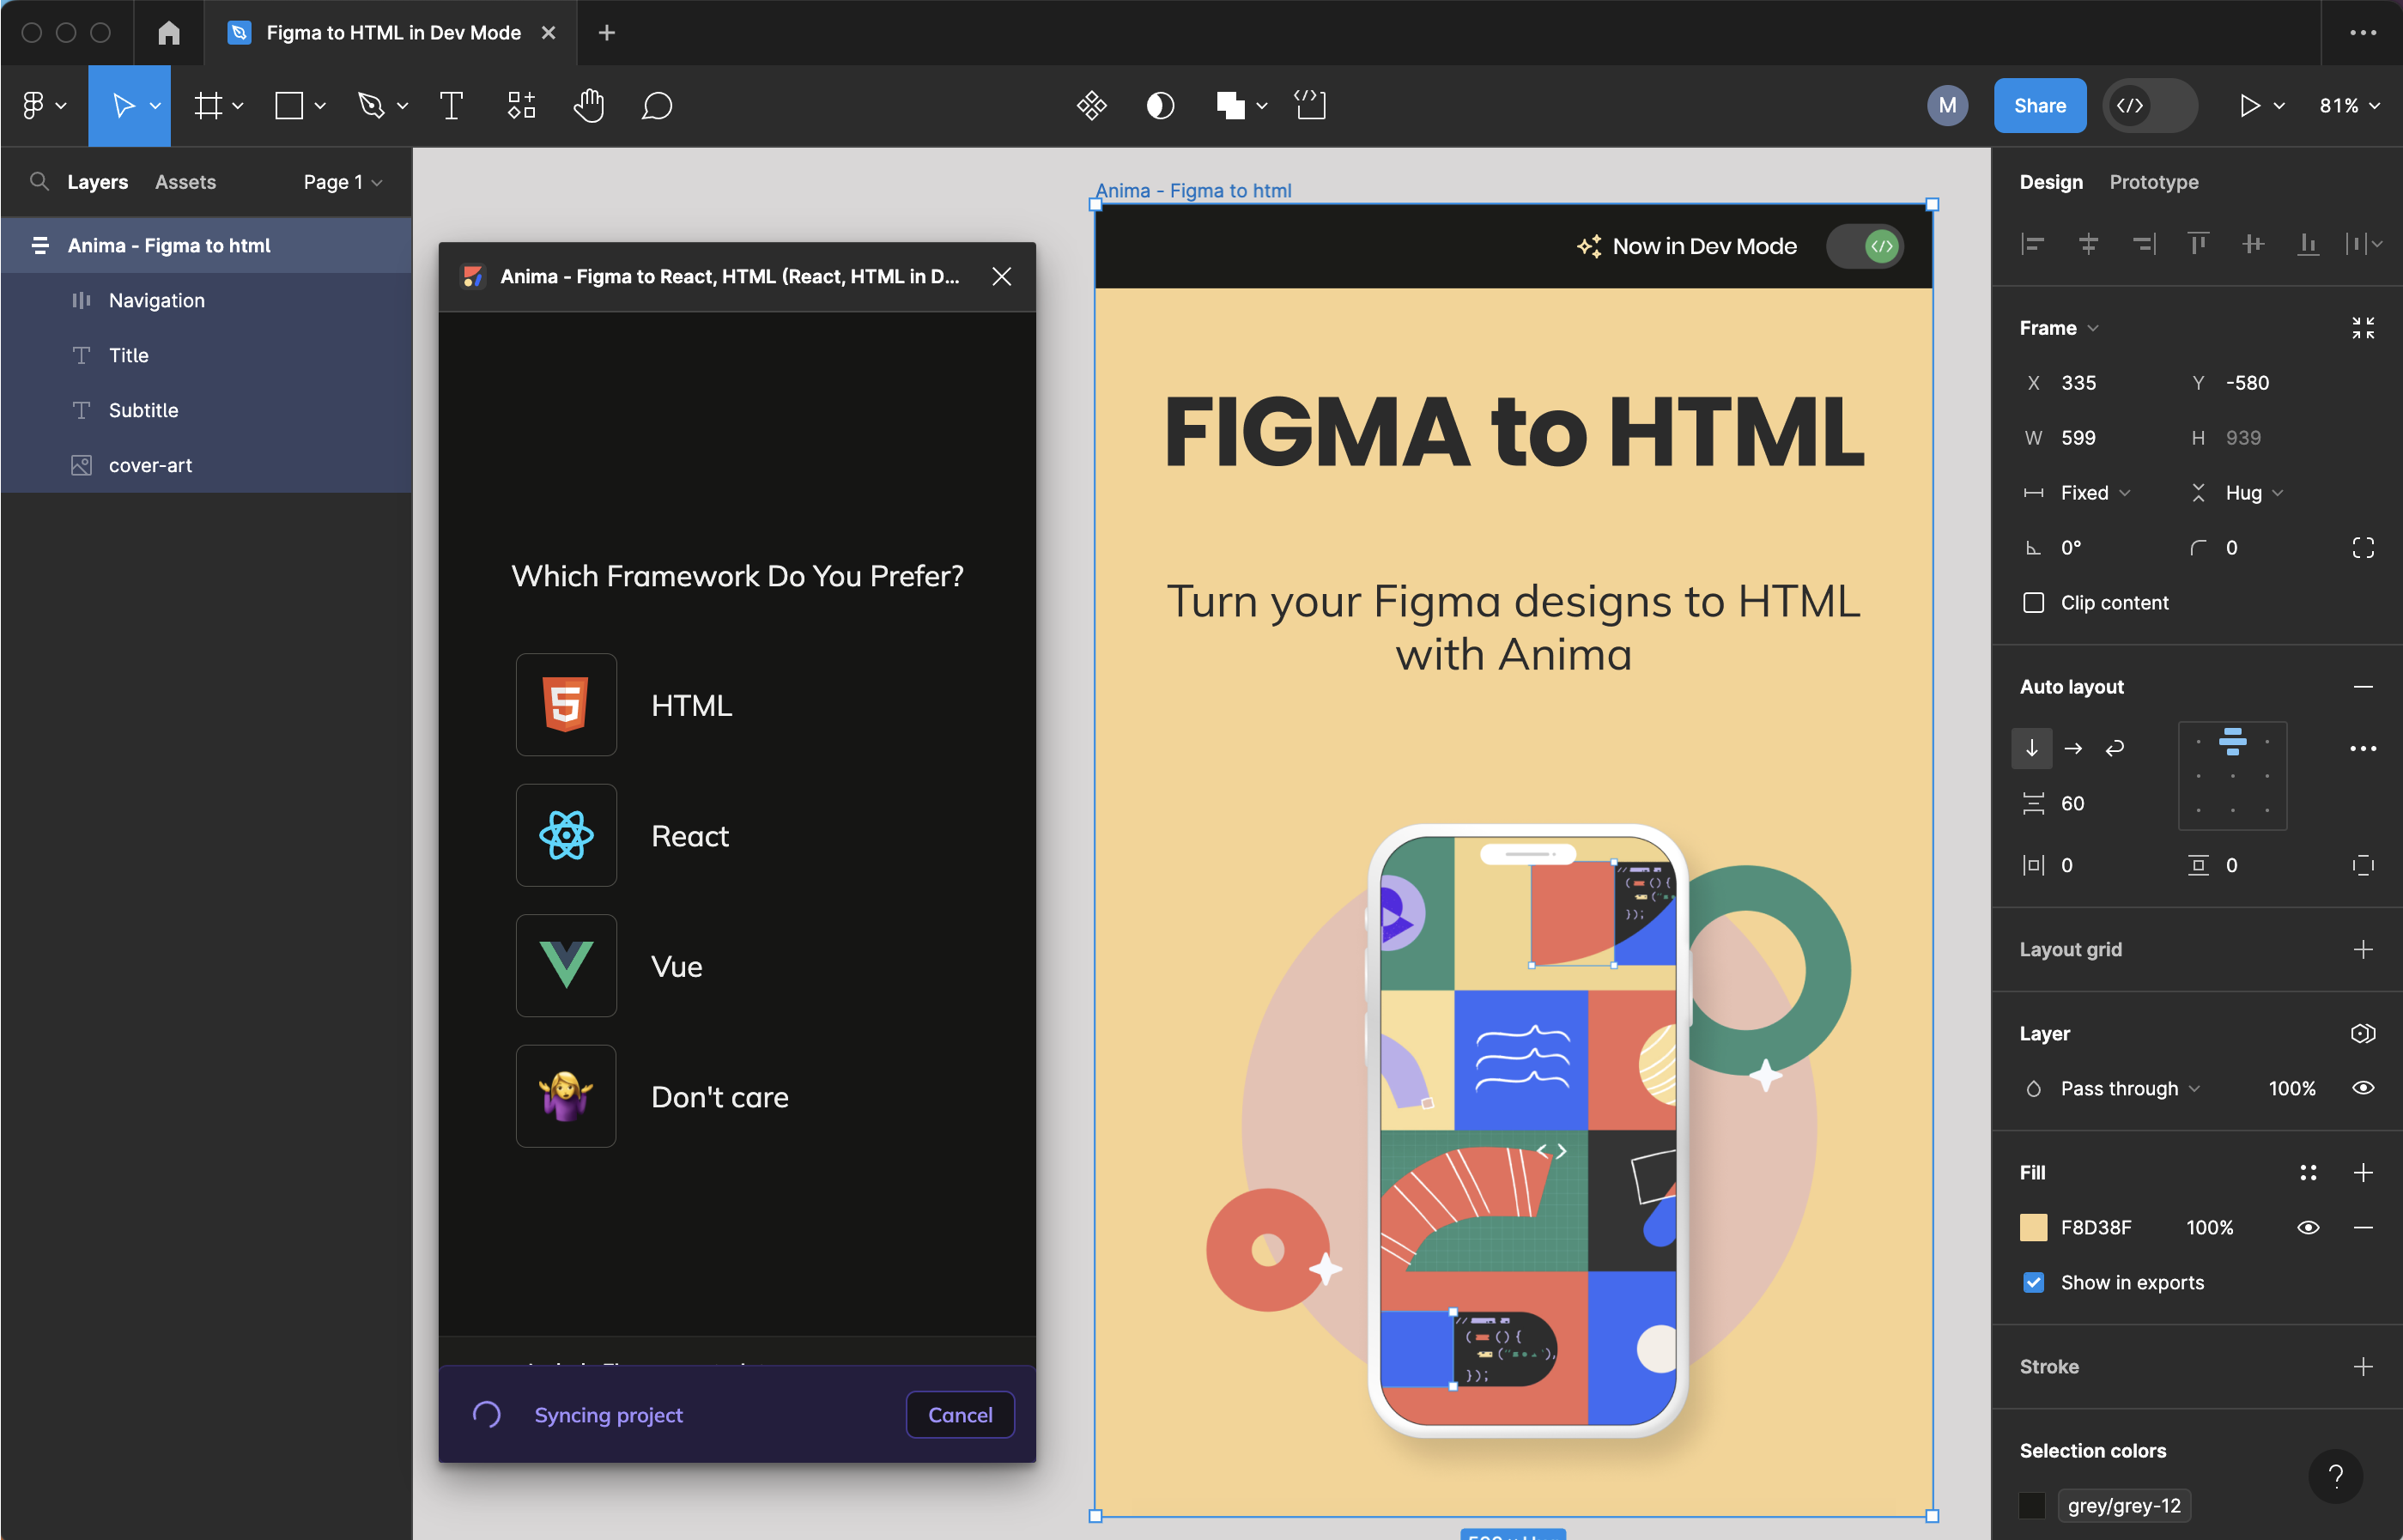
Open the Anima Plugin in Figma. Notice that if you’ve created a project before it should be listed here.
Select Preview. You will see this popup window when you can check the responsiveness of this template.
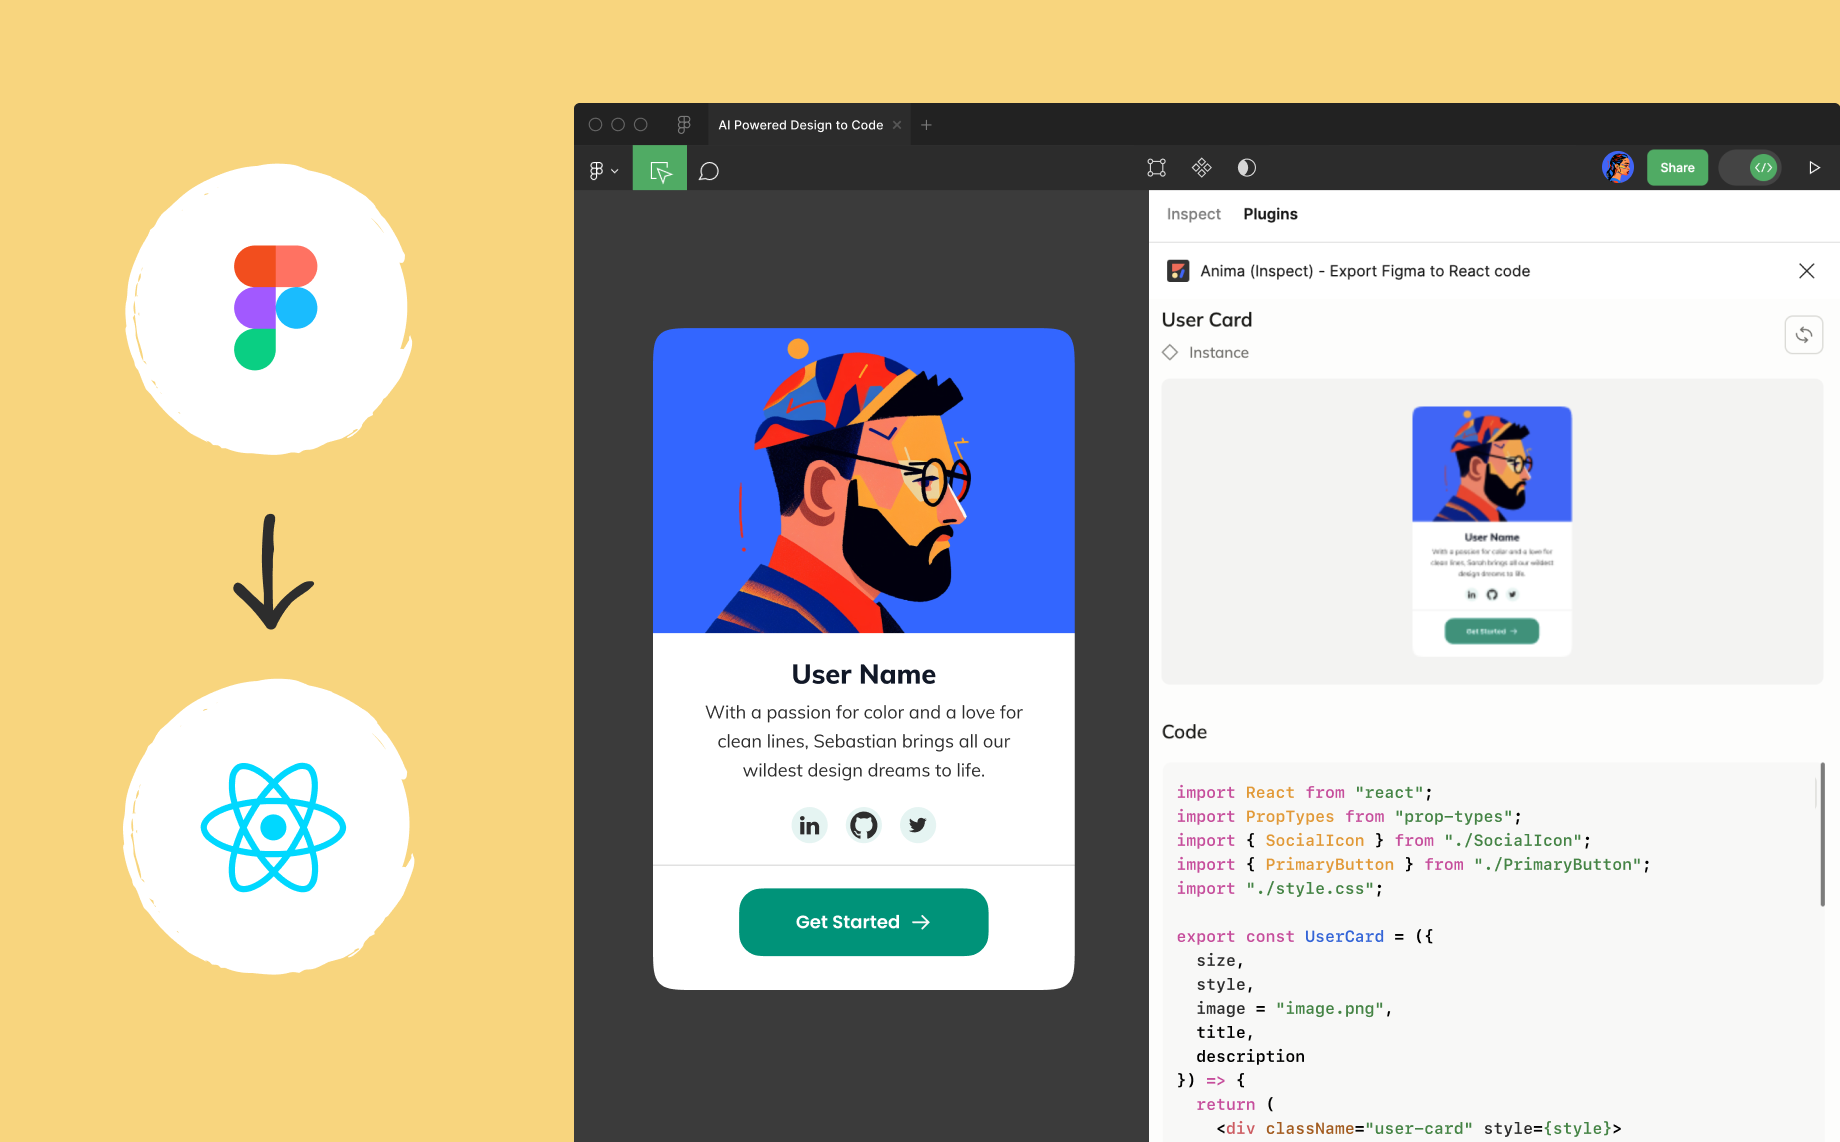
Select the Get Code option and choose React. From this design, Anima will generate a full list of React components.
This process can take a few minutes, but when it is completed successfully, it will open our project in the Anima web app.
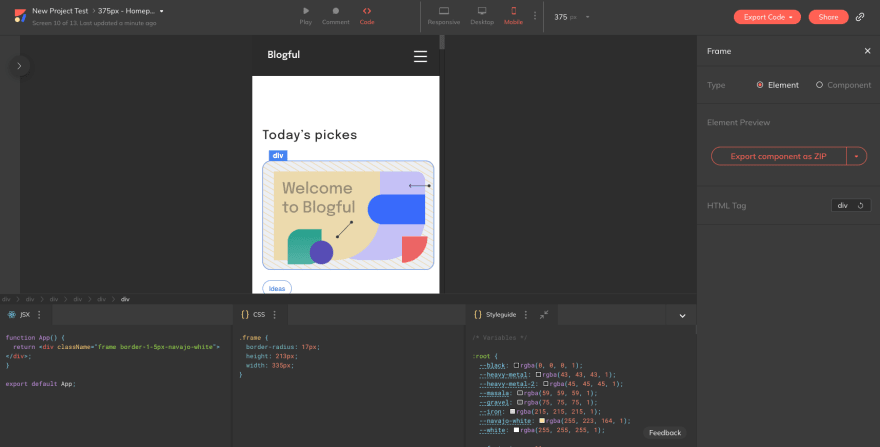
As you can see, Anima is generating functional React code for any component you select. You also have the option to change the view to desktop and tablet.
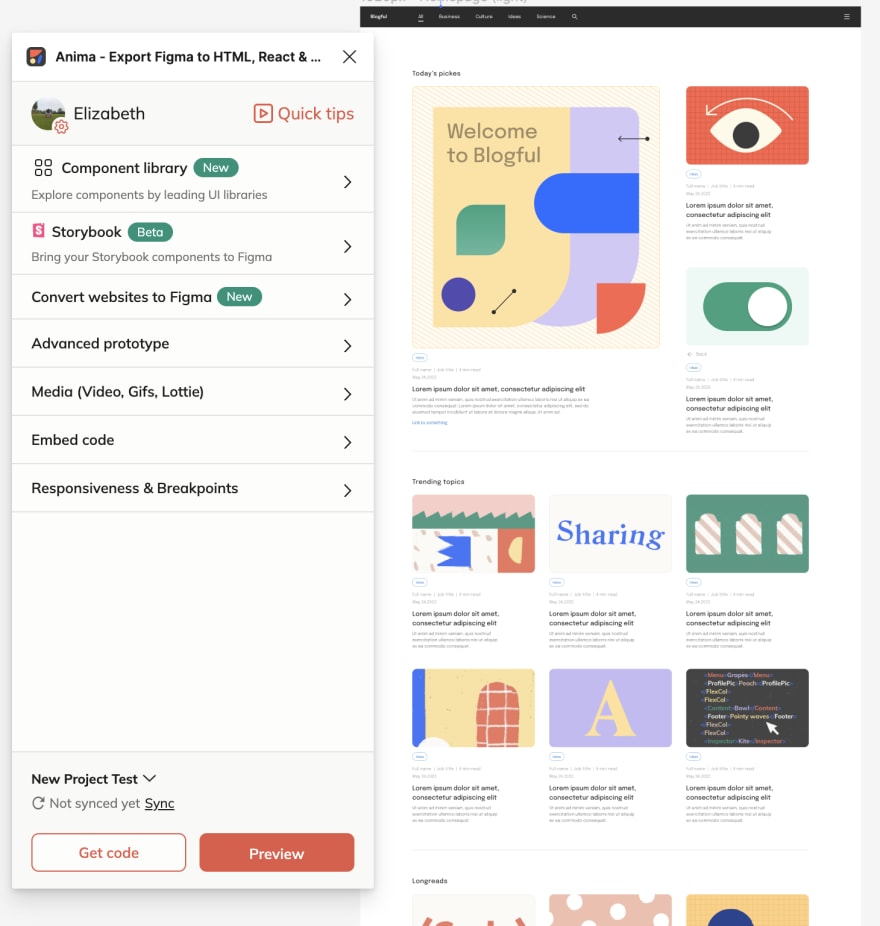
For this tutorial, we will only be working with one breakpoint screen, in this case, the 1440 px screen homepage light. You can navigate to this screen by clicking the dropdown menu in the upper left corner of the platform.
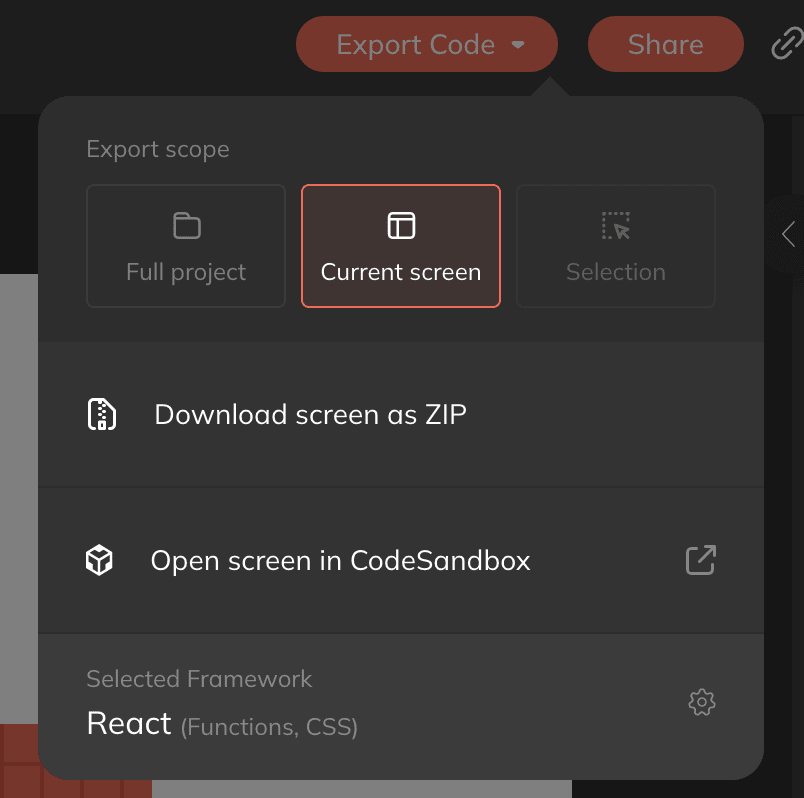
Select Export Code. You will see three different options, select Current Screen and click Download screen as ZIP. Make sure the chosen framework is React.
For more on getting React code from Figma, check out this article or watch this tutorial.
This will generate a zip file with the codebase ready to open and use in our IDE.
Anima uses Parcel to compile our jsx files, so when your download is ready you just need to install the dependencies with npm install and then run npm start.
If you navigate to http://localhost:1234 our Anima project should be up and running.
Let’s create content in Contentful
Now that we have our blog running is time to create some content for it.
Create an account in Contentful to start.
When we enter the Contentful platform the first thing we need to do is create a new content type, in this case, a new article.
Select Content Model in the navigation and then click on Add content type.
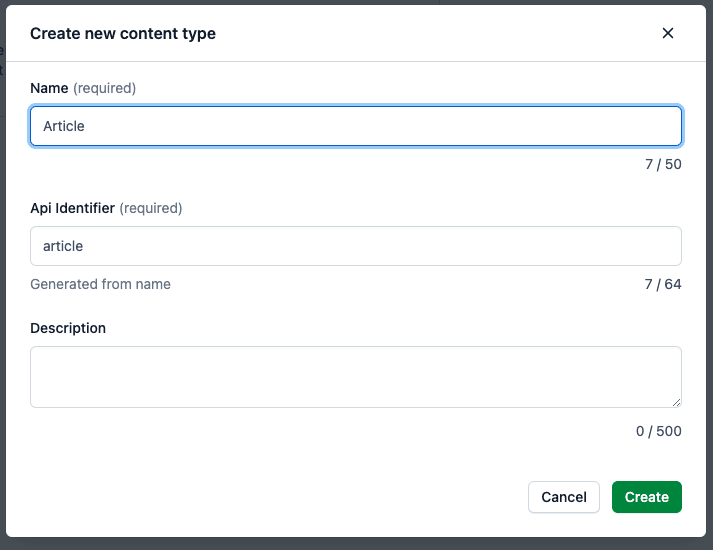
After clicking create it will navigate to our content type settings for adding new fields.
If we review the design we notice that our article has an image, a title, a description, and some other fields. We need to create all of them and select the correct type for each.
After you finish creating all the fields, you should have something similar to this.
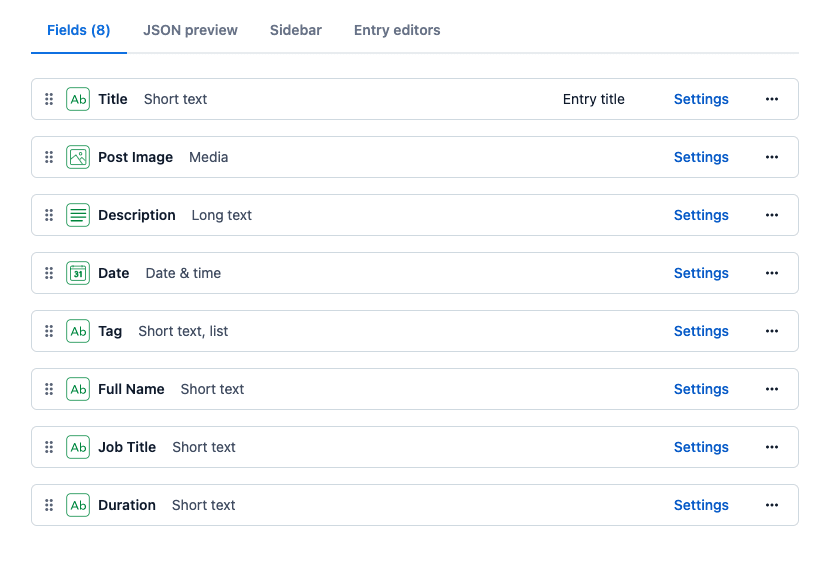
Click Save and we will have our content type ready to create new articles.
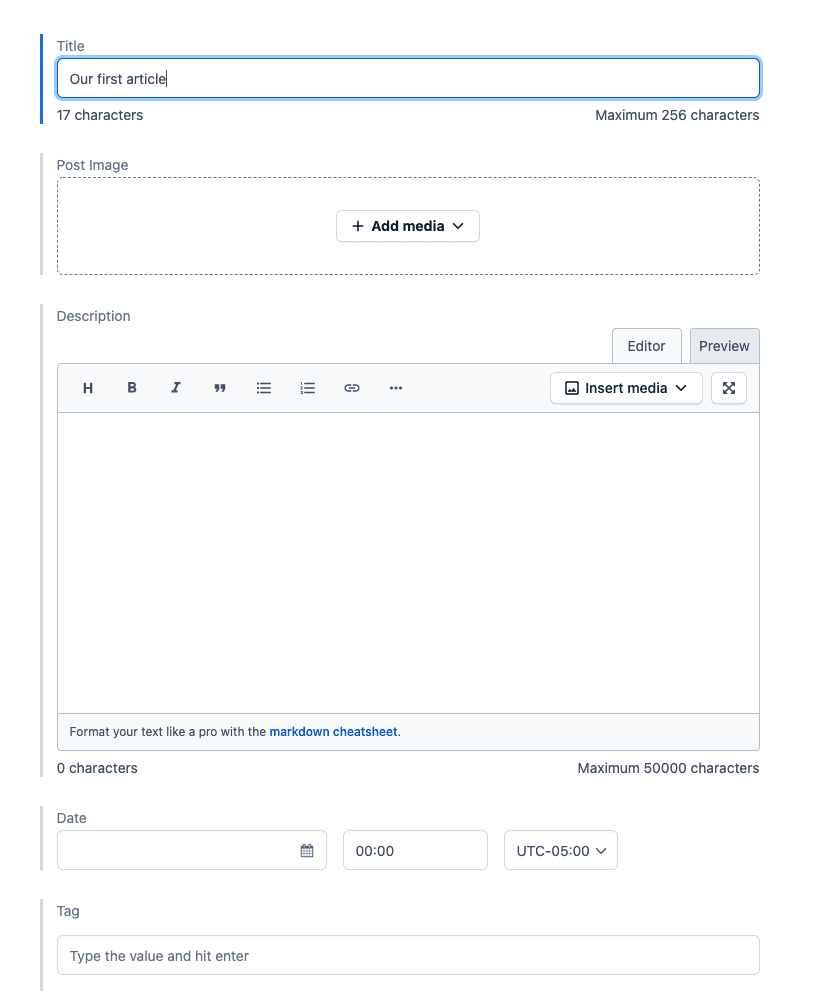
Navigate to Content and select Add Article. Now it’s time to fill up our first article.
Integrate Contentful CMS for dynamic content
Now that we have some articles created and our React project, it’s time to integrate both to have a completely functional blog with dynamic content.
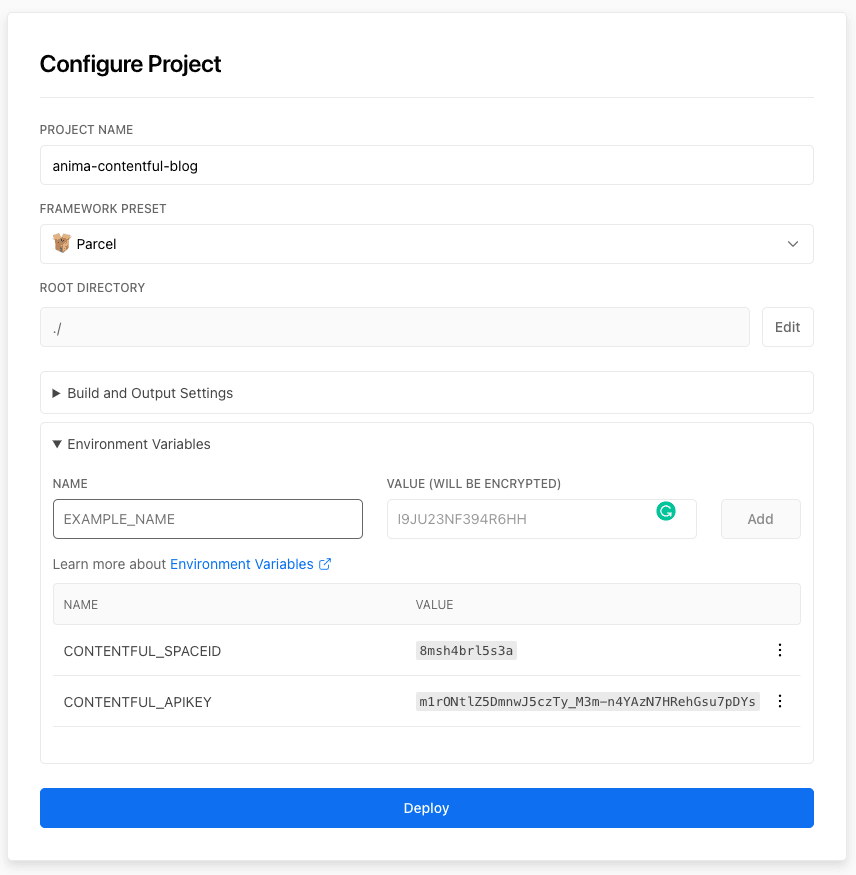
Let’s create a new .env file at the root of our project to store the contentful keys we will need. You can find your keys on Settings > Api Keys.

We also need to install the contentful dependency npm install contentful.
Let’s use a hook to get a list of articles from contentful. Create a new services folder and then create a use-articles.jsx file.
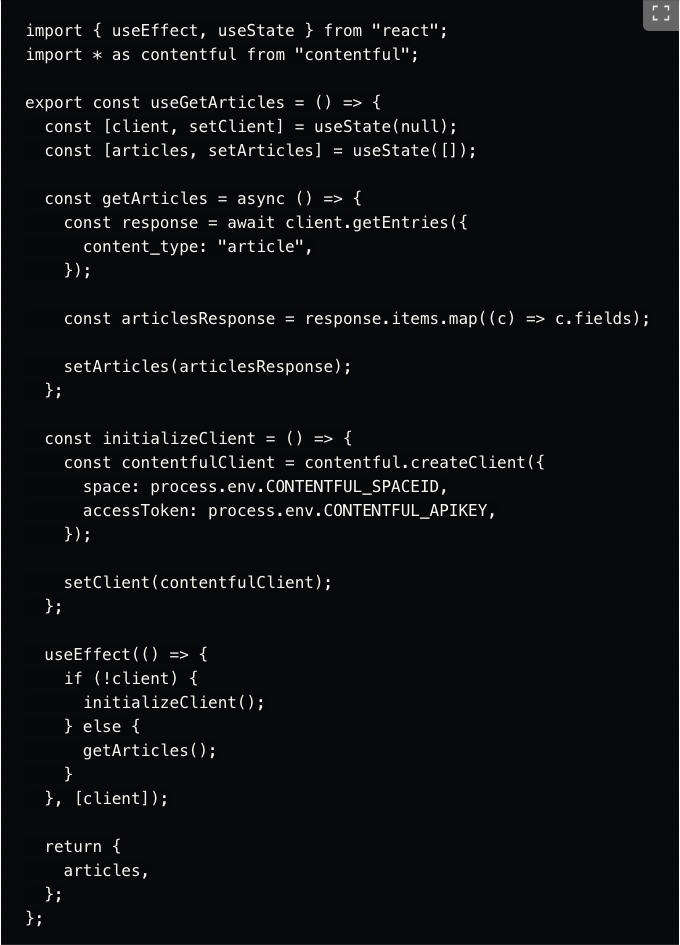
We are using the Content Delivery Api to get our articles.
Remember to use the correct content_type to get the entries, in this case, it is article.
Now that we have a service to get our articles we need to pass it to our components. there are some small tweaks we need to do in the code. Follow the repo for a guide. It’s basically cleaning some parts and passing the props properly.
It’s time to deploy
We are going to use Vercel to deploy our blog.
We have to previously push our code in GitHub, and grant access to Vercel. After that, you will see the project listed.
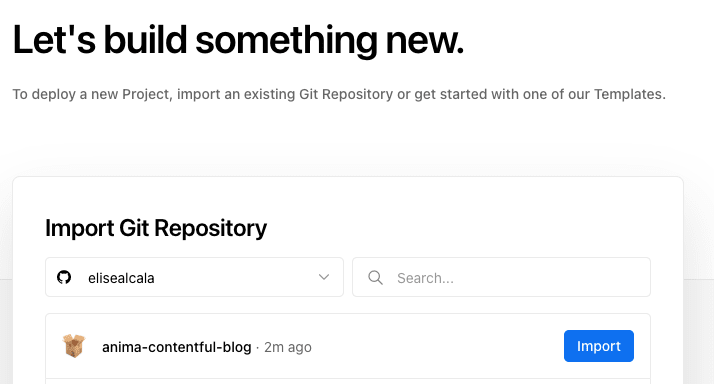
Select Import.
Before deploying make sure to add the environment variables that we previously set on development.
Now you can deploy the app.
 in TLV.